Last Friday I saw the cutest hostess apron in the Short North, and thought, what a great idea for my friend S, who was hosting Thanksgiving dinner on Sunday. It was made out of a thin cotton material, like quilting fabric, in two contrasting pattern/colours. It was also ridiculously priced considering it was really just a rectangle with a waistband attached to it. It did have a nifty tag that really sold me on the merits of a hostess apron.
So, as any handy crafter would do, I decided to make my own version of it. When I was picking up supplies for my upholstery class, I spotted some really cute, colourful prints and bought a half yard of each (I was tempted to get a several other prints but decided I should probably stick to one apron for now). I have been on a big orange and pink kick lately.

Pattern: None really - measurements taken from an apron I already had.
Fabric: Cotton canvas decorator fabric, 1/2 yard each (Braemore Designs)
Source: Fabric Farm Interiors
I didn't take measurements when I was making this, so this is really more of a general guide.
Instructions:
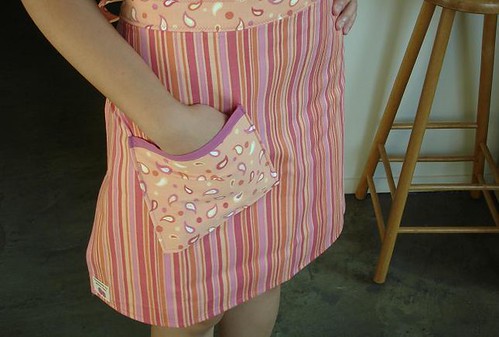
Cut out a rectangle for main apron bit, wide enough so it wraps a little around your hips. Mine was about 27-28" I think. Hem the sides and bottom.
Cut out a 2-inch wide strip about 80" long of contrasting fabric for the waist and ties. I had to cut 3 strips of just over 26" and attach them all together. Fold in half, right sides together, and stitch a 1/2 inch seam around each end, leaving a big gap in the middle (about 27" or a little bigger than the width of your apron). Turn the ends right side out and iron the whole band flat. Now iron a 1/2 inch seam on the gap edges so you'll have a guide for the next part.
Then you attach the waist band like bias binding (here's an explanation)- match the right side of the band with the right side of the apron and stitch a 1/4 inch seam. Open it out and iron, then fold it so that the waist band wraps around the main apron. Then you do a 'stitch in the ditch' to attach the back of the band to the apron. I added a zig zag top stitch along the whole band and then attached a pocket (this may seem like a dumb comment but make sure the pocket is big enough for your hand).
You're done!