 The studio is used by potters with all levels of experience - there were some really beautiful pieces lining the shelves, glazed and unglazed:
 I love the glaze on these bowls - D's mom knows the artist and explained that they were dipped in two glazes, and where they overlapped, created another colour effect.
 Basic clay prep and throwing starts with wedging the clay, which involves pressing the clay down in repeated motions to remove trapped air bubbles inside, which stops it from doing crazy things like exploding in the kiln and such (always a good thing).
Next up, a quick lesson on centreing our clay on the bat and wheel, forcing it into a cone and the flattening it (called coning) before you start to shape it:

 Another interesting point: almost all the clay can be used over and over again - very little is ever wasted, because you can immerse dried clay in water and it can be reclaimed!)
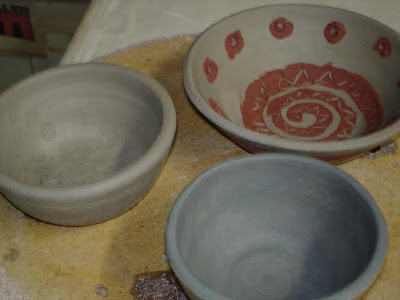
 Not bad! Three bowls survived - mine is the bottom right. At this point we left the bowls to dry for a few days to reach leather-hard stage, when you can shape the base of the bowl. Below are mugs that D's mom made us for Christmas:


 Back in November, I was suddenly inspired to start knitting lace when I saw Ms.
  Anyhow, it has been going smoothly for the last 22 rows, with the occasional lost YO, but nothing I wasn't able to fix. And it's looking appropriately lacey with holes and things in all the right spots. This is getting ahead of things, but I'm totally excited to block this thing once it's done, as lace is supposed to undergo this amazing transformation from lumpy frumpiness to delicate gloriousness.
 Pattern:
  Three: Warm up the fondant by kneading it in your hands, and add flavouring or colour as required, and roll out on a icing sugar-dusted surface. Drape it over the cake:
 Four: Using your hands (or special fondant tools if you have them), smooth the fondant over the cake, pressing top to bottom for the sides, and trim the excess.


